
How to view and edit approval rules in DigitAI
Approval Rules determine who must authorize a document based on specific criteria such as entity, reason, or amount. This guide explains how to view the approval matrix, modify approvers for a specific level, configure rule parameters (filter ranges, required fields, and displayed fields), and replace a user across all rules using slot management.
Step by step
- 1
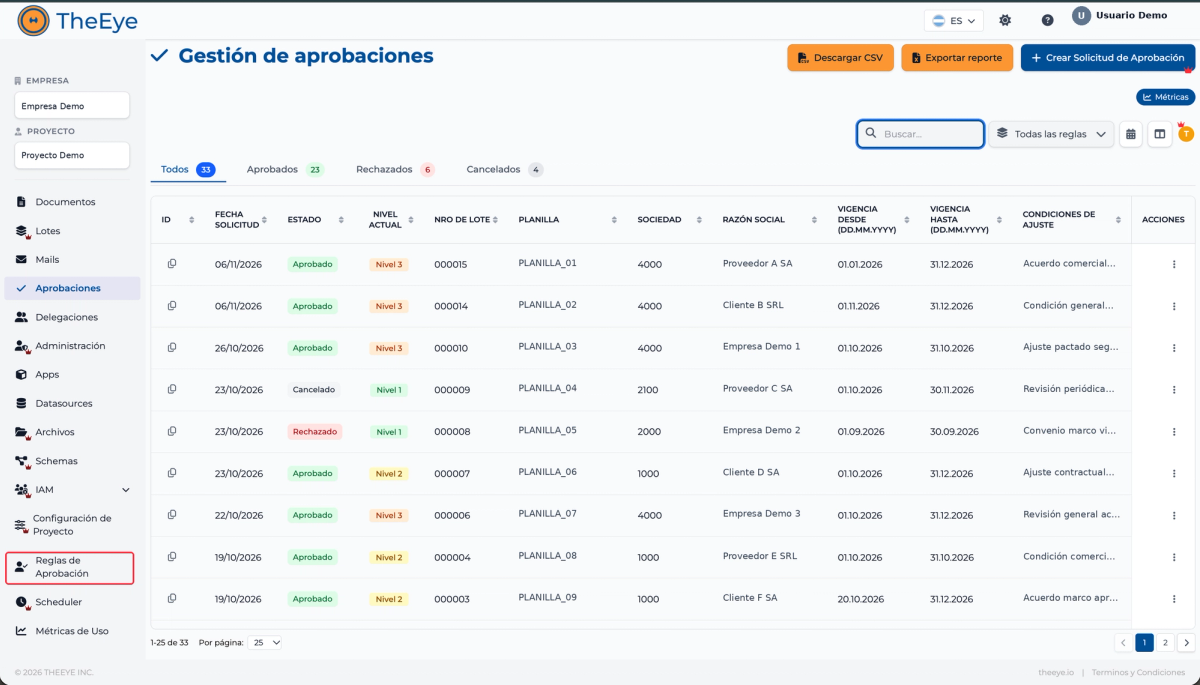
Navigate to Approval Rules
1. Log in to https://digitai.theeye.io using your corporate credentials. 2. Select your Company and Project from the top navigation. 3. In the left sidebar menu, click on Approval Rules (Reglas de Aprobación).
- 2
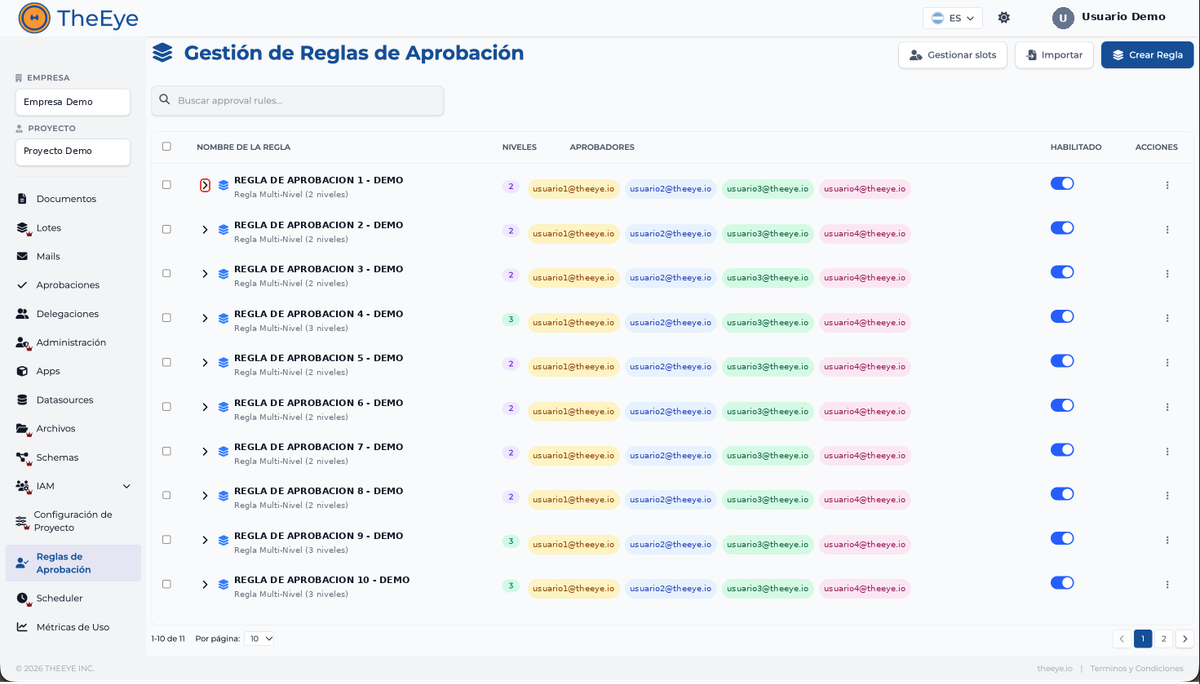
View the approval rules table
The main table displays all configured rules along with key details: Rule Name, Entity/Company, Effective Dates, Configured Levels, and Actions.
- 3
Search and inspect a rule
Use the search bar to locate a rule by name, entity, or reason. Click the arrow (›) on the left side of the rule name to expand its levels and view the assigned approvers.

- 4
View expanded levels and assigned approvers
When expanded, each stage of the approval hierarchy (Level 1, Level 2, etc.) is displayed along with the approvers or slots assigned to that step.

- 5
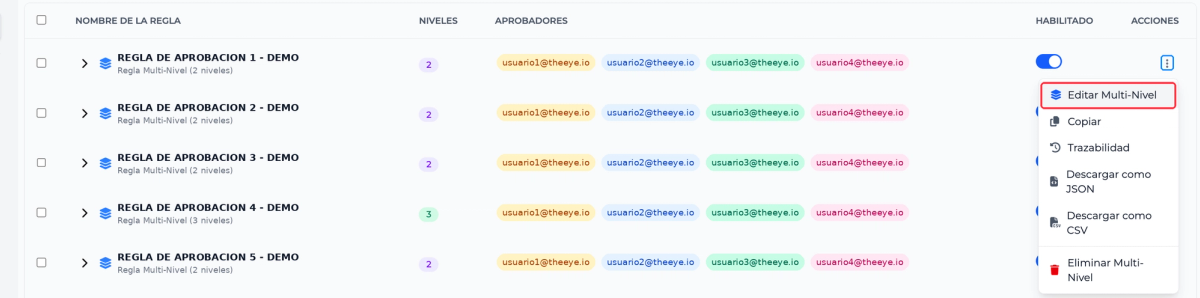
Open the Multi-Level Edit menu
Locate the rule you want to edit and, from the three dots menu (⋮) on the right, select Multi-Level Edit (Editar Multi-Nivel).
- 6
Configure filters, fields, and approvers
The Multi-Level Edit configuration form allows you to manage: - Header & Global Filters: Rule name, description, and application conditions (Company, Reason). Amount threshold ranges are typically locked to ensure matrix consistency. - Approvers by Level: Add or remove approvers linked to configured slots for each level. - Required Fields: Mandatory information approvers must enter before approving or rejecting. - Displayed / Additional Fields: Document data visible to approvers in the review modal (click to toggle visibility). - Level Options & Notifications: Require All settings, direct rejection, mandatory comments or files, and automated email alerts. Click Update Multi-Level Rule to apply and save changes.
- 7
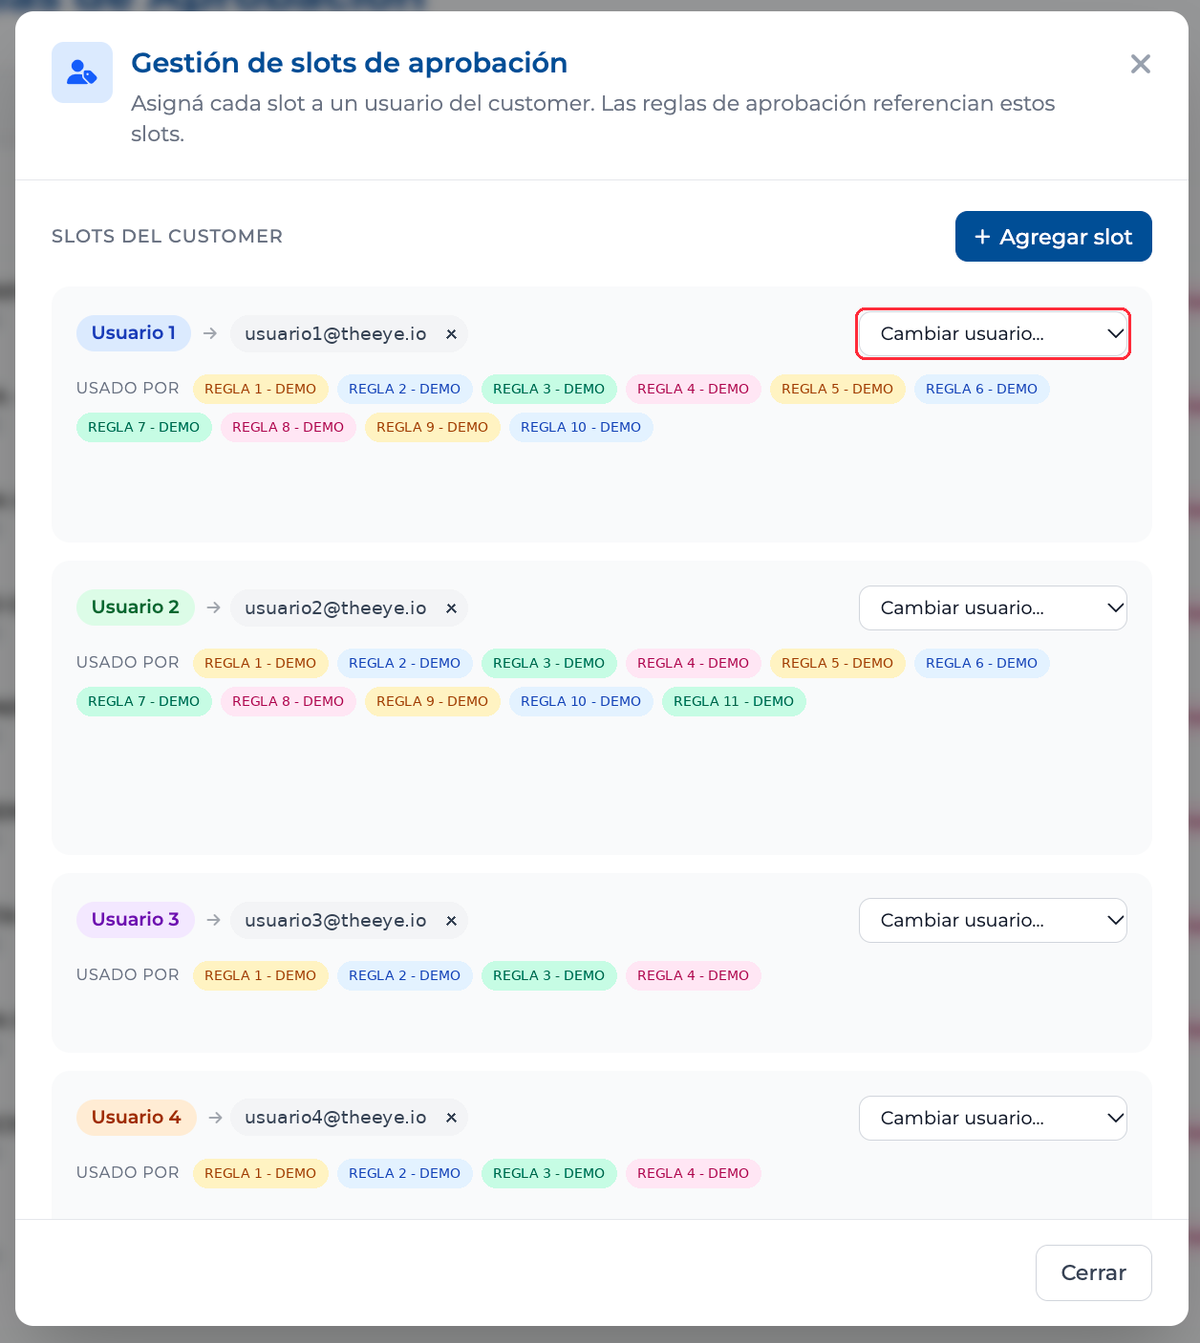
Access Manage slots
If an approver changes roles or leaves the team, you can replace them across all associated rules at once without editing rules individually. In the top-right corner, click Manage slots (Gestionar slots).

- 8
Reassign user in slots
Inside the Manage slots modal: 1. Locate the slot currently assigned to the team member. 2. In the Change user... dropdown, select the new approver. 3. Confirm the update to automatically reassign that slot across all associated rules.
Last updated: 11/17/2026
Still have questions?
Contact support